当BlogサイトはPHPベースのWordPressで動作しているのですが、htmlの静的ページに比べると非常に動作が遅いです。
今回、PHP7にAPCuを導入(ソースビルド)することで3倍近く高速化に成功しましたので投稿しておきます。
私のWebサーバー(CentOS 7 + Apache 2.4 + PHP 7)は、yumではなくソースからビルドして動作させているので、巷に溢れる高速化手段を簡単に導入できずにいましたが、たまたま見かけたこのサイトを参考にさせていただき無事改善させることができました。ありがとうございました!
まず結果から
Server Software: Apache/2.4.41
Server Hostname: ji0vwl.net
Server Port: 443
SSL/TLS Protocol: TLSv1.2,ECDHE-RSA-AES128-GCM-SHA256,4096,128
TLS Server Name: ji0vwl.net
| 未対策 | APCuを導入 | |
| Requests per second: | 3.33 [#/sec] | 10.30 [#/sec] (x3.1) |
| Connect (min): | 43 [ms] | 46 [ms] |
| Processing (min): | 372 [ms] | 137 [ms] (÷2.7) |
| Waiting (min): | 361 [ms] | 124 [ms] (÷2.9) |
| Total (min): | 415 [ms] | 183 [ms] |
接続時間は変わりませんが、処理時間と待ち時間が3分の1ほどに短縮され、このWebサーバーで捌ける秒間リクエスト数が約3倍となりました。
導入
基本的にはこのページの通りなのですが、PHPのビルドのところだけ違います。Apache 2.4.41とOpennSSL 1.1.1cはすでに導入済みなので、PHPだけ再ビルドすればOKです。
5. PHP 7.3.8 を /usr/local/php7.3.8 にインストールする
5.1. PHPとAPCu/APCu_bcの準備
それぞれ最新のソースをwgetでダウンロードしてきます。apcuとapcu_bcは、PHPのソース展開後 php-7.3.8/ext/ ディレクトリ内に展開し、それぞれリネームします。
$ sudo -i
# cd /usr/local/src
# yum -y install libxml2-devel systemd-devel libpng-devel libwebp libwebp-devel libwebp-tools
# wget http://jp2.php.net/get/php-7.3.8.tar.gz/from/this/mirror -O /usr/local/src/php-7.3.8.tar.gz
# tar -xvzf php-7.3.8.tar.gz
# cd php-7.3.8/ext
# wget -q https://pecl.php.net/get/apcu-5.1.17.tgz
# wget -q https://pecl.php.net/get/apcu_bc-1.0.5.tgz
# tar zxvf apcu-5.1.17.tgz
# tar zxvf apcu_bc-1.0.5.tgz
# mv apcu-5.1.17 apcu
# mv apcu_bc-1.0.5 apcu_bc
# cd ..
# rm -rf configure
# ./buildconf --force
Forcing buildconf
Removing configure caches
buildconf: checking installation...
buildconf: autoconf version 2.69 (ok)
rebuilding aclocal.m4
rebuilding configure
rebuilding main/php_config.h.in
5.2. PHP 7.3.8 を /usr/local/php7.3.8 にインストールする
–with-apxs2=[dir]でPHPとApacheを、–with-openssl=[dir]でPHPとOpenSSLを、–with-mysql-sock=[dir]でPHPとmySQLを結びつけます。
今回は–enale-apcと–enable-apcuを追加しています。
# ./configure \
--prefix=/usr/local/php7.3.8 \
--with-apxs2=/usr/local/httpd4/bin/apxs \
--with-openssl=/usr/local/ssl \
--with-mysql-sock=/var/lib/mysql/mysql.sock \
--with-mysqli \
--with-pdo-mysql \
--enable-mbstring \
--with-freetype-dir=/usr \
--with-png-dir=/usr \
--with-jpeg-dir=/usr \
--with-webp-dir=/usr \
--with-gd=shared \
--with-zlib \
--with-fpm-systemd \
--with-fpm-user=apache \
--with-fpm-group=apache \
--enable-gd-jis-conv \
--enable-fpm \
--enable-apc \
--enable-apcu
# make
# make install
# libtool --finish /usr/local/src/php-7.3.8/libs
5.3. php.iniを作成する
いままでphp.iniを作らずに素の状態でやってきましたが、APCuを有効にするために作成します。Opcacheも有効にしておきます。php.iniを作る場所ですが、私の場合PHPインストールディレクトリ配下のlib/ディレクトリ内でした。分からない場合はこちら。
# cd /usr/local/php7.3.8/lib
# vim php.ini
max_execution_time=600
memory_limit=128M
error_reporting=0
display_errors=0
log_errors=0
user_ini.filename=
realpath_cache_size=2M
cgi.check_shebang_line=0
date.timezone = "Asia/Tokyo"
zend_extension=opcache.so

[opcache]
opcache.enable=1
;opcache.enable_cli=0
opcache.memory_consumption=64
opcache.interned_strings_buffer=8
opcache.max_accelerated_files=4000
;opcache.max_wasted_percentage=5
;opcache.use_cwd=1
;opcache.validate_timestamps=1
opcache.revalidate_freq=2
opcache.revalidate_path=0
;opcache.save_comments=1
opcache.fast_shutdown=1
;opcache.enable_file_override=0
opcache.optimization_level=0xffffffff
;opcache.inherited_hack=1
;opcache.dups_fix=0
;opcache.blacklist_filename=/etc/php.d/opcache*.blacklist
;opcache.max_file_size=0
;opcache.consistency_checks=0
;opcache.force_restart_timeout=180
;opcache.error_log=
;opcache.log_verbosity_level=1
;opcache.preferred_memory_model=
;opcache.protect_memory=0
;opcache.restrict_api=
;opcache.file_cache=
;opcache.file_cache_only=0
;
apc.enabled = 1
apc.enable_cli=1
apc.shm_size=40M
apc.ttl=3600
apc.gc_ttl=3600
;apc.mmap_file_mask=/tmp/apc.XXXXXX
;
;;mbstring
mbstring.language = Japanese
mbstring.internal_encoding = UTF-8
mbstring.http_input = UTF-8
mbstring.http_output = pass
mbstring.detect_order = UTF-8,SJIS,EUC-JP,JIS,ASCII
:wqで保存したら、最後にhttpd4(私のWebサーバーの名前)を再起動して完了!
# systemctl restart httpd4
パフォーマンス確認方法
Macのコンソールから、ab(Apache Bench)コマンドを実行。簡単ですね。
$ ab -n [総リクエスト数] -c [同時リクエスト数] [URL]
$ ab -n 10 -c 10 https://test.ji0vwl.net/
This is ApacheBench, Version 2.3 <$Revision: 1826891 $>
Copyright 1996 Adam Twiss, Zeus Technology Ltd, http://www.zeustech.net/
Licensed to The Apache Software Foundation, http://www.apache.org/

Benchmarking ji0vwl.net (be patient).....done


Server Software:        Apache/2.4.41
Server Hostname:        ji0vwl.net
Server Port:            443
SSL/TLS Protocol:       TLSv1.2,ECDHE-RSA-AES128-GCM-SHA256,4096,128
TLS Server Name:        ji0vwl.net

Document Path:          /
Document Length:        26601 bytes

Concurrency Level:      10
Time taken for tests:   0.971 seconds
Complete requests:      10
Failed requests:        0
Total transferred:      271380 bytes
HTML transferred:       266010 bytes
Requests per second:    10.30 [#/sec] (mean)
Time per request:       971.152 [ms] (mean)
Time per request:       97.115 [ms] (mean, across all concurrent requests)
Transfer rate:          272.89 [Kbytes/sec] received

Connection Times (ms)
              min  mean[+/-sd] median   max
Connect:       46  183 212.3     89     586
Processing:   137  410 165.4    466     578
Waiting:      124  398 165.5    453     566
Total:        183  593 171.0    628     799

Percentage of the requests served within a certain time (ms)
  50%    628
  66%    652
  75%    664
  80%    777
  90%    799
  95%    799
  98%    799
  99%    799
 100%    799 (longest request)
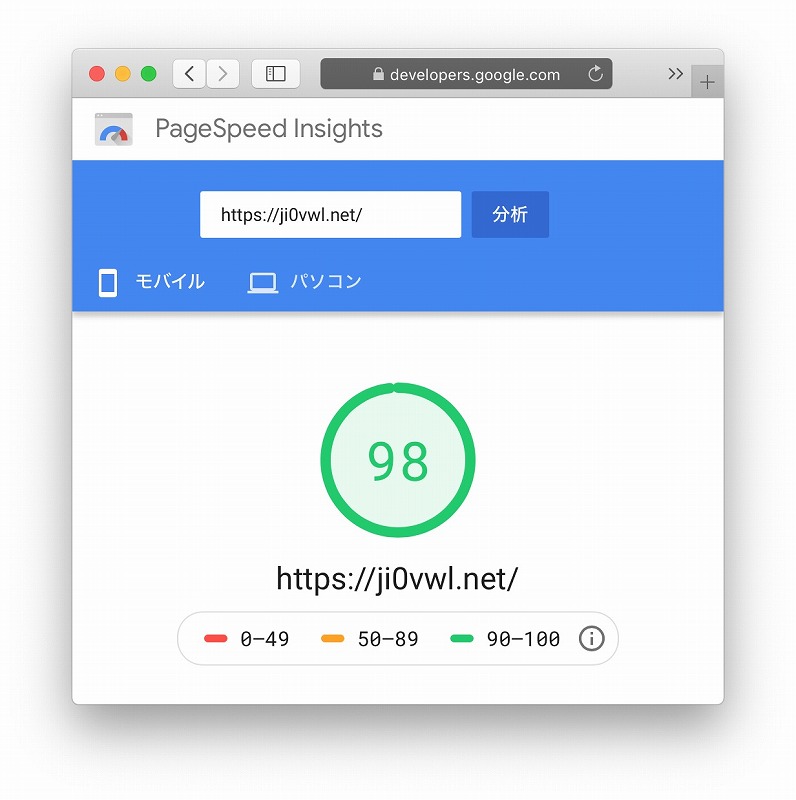
t3a.nanoという貧弱インスタンスでも GoogleのPageSpeed Insightsでも高得点が出るようになりました。パソコンの方は甘いので比較的簡単に100点近くが出ますが、モバイルの方はかなり辛めで、いままで良くても80点代後半でした。